Sending emails via SES with Cloudflare Workers
Learn how to send emails from Cloudflare Workers via Amazon SES. Covers AWS setup, IAM config, Worker code, and security best practices.


While Cloudflare Email Workers now support replying to incoming messages, this doesn't work if you want to send an email from a Cron Trigger, Fetch Handler, etc.
Previously, MailChannels offered a free REST API for sending emails out of a Worker, but that has since gone away. Additionally, MailChannels has a.. "questionable" security history.
Our recommendation has been to use Amazon Simple Email Service (SES) from Workers. There's many benefits of using it:
- SES supports publishing events (like deliveries, bounces, clicks, opens, etc) to Amazon SNS, and SNS supports sending these events to HTTP(S) endpoints (which can be another Cloudflare Worker too). Cloudflare Email Workers do not any event feedback/callbacks (yet?), aside from an initial success/failure promise.
- SES has the best access control mechanisms we've seen in any email service provider (ESP). In this tutorial, we'll show how we can restrict sending to only one email domain, and enforce our sender address and name. This limits our risk significantly if an attacker ever compromised our Worker or the raw AWS secret access key itself.
- SES is cheap at $0.10/1000 emails. Yes, there are are other ESPs that have a free tier for low volume, but seem to almost be universally more expensive than SES once you go through the free tier. (You could use another ESP for their free tier, and then SES for any emails after that.. but then you have to support multiple webhook formats. This isn't worth the effort to save a few dollars in our opinion.)
- SES has over a dozen different regions. While we won't cover it in this tutorial, you can easily add fallback regions to your code.
- SES supports DKIM. We recommend you use "Bring Your Own DKIM" (BYODKIM), as we have had transient issues with Microsoft Outlook and Easy DKIM (which uses Route 53 for the automatic DKIM TXT DNS records); these issues went away after we switched away from Easy DKIM to BYODKIM (with DKIM TXT DNS records on Cloudflare). (This is technically an Outlook issue and not a problem with SES, but at the end of the day, it's still our problem if emails are landing in spam.)
- SES supports BIMI, which you'll probably want if you're a large company.
- SES does not mutate your raw email bodies (unless you enable open or click tracking). This is critical if you are planning on using PGP or S/MIME with SES. e.g. SendGrid does not work with unencrypted S/MIME signatures.
- SES supports AMP. This is free to register for (unlike BIMI).
Now that we've convinced you this is a good idea, let's jump into the tutorial!
First, you're going to need to set up domain identity in SES, along with the corresponding SPF, DKIM, and DMARC DNS records on your domain. We won't cover the setup in this post, as many other sites and Amazon have provided great tutorials already.
Optionally (not required for this tutorial), send AWS a production access request to move out of the Amazon SES sandbox. If you're confused on what you need to tell AWS to be approved, check out many of the great other posts on the internet for that. You definitely should tell AWS that you will be using SNS to automatically handle bounce and complaint notifications. Note: if you're only sending emails to your own domain and you're sending <200 emails per region in a 24-hour period, do you not need to request production access. Given that there's 22 public AWS SES regions at the time of writing, you'd be able to send 4,400 emails per 24-hour window if you use every region.
Worker Setup
Onto the coding! If you'd like to just see the final code, check out https://github.com/aimoda/ses-email-demo-worker.
We're going to use two packages in our Worker: aws4fetch for signing requests to AWS, and mimetext for building the raw email that we're sending to SES. Let's set that up in our Worker:
import { AwsClient } from 'aws4fetch';
import { createMimeMessage } from 'mimetext/browser';

export interface Env {
  AWS_SES_ACCESS_KEY_ID: string
  AWS_SES_SECRET_ACCESS_KEY: string
  AWS_SES_REGION: string
}

export default {
  async scheduled(controller: ScheduledController, env: Env, ctx: ExecutionContext) {
    // ...
  }
}
Setting up index.ts with a scheduled (Cron) handler
We'll need to define a dev and production configuration in our wrangler.toml file.
name = "ses-email-demo-worker-dev"
main = "./src/index.ts"
compatibility_date = "2024-05-13"
workers_dev = false

[dev]
ip = "localhost"
local_protocol = "http"
port = 61023

[vars]
ENVIRONMENT = "dev"
AWS_SES_REGION = "us-east-2"
AWS_SES_ACCESS_KEY_ID = "AKIAIOSFODNN6EXAMPLE"


[env.production]
name = "ses-email-demo-worker"
minify = true
logpush = true

[env.production.vars]
ENVIRONMENT = "production"
AWS_SES_REGION = "us-east-2"
AWS_SES_ACCESS_KEY_ID = "AKIAIOSFODNN7EXAMPLE"
# wrangler secret put -e production AWS_SES_SECRET_ACCESS_KEY

[env.production.triggers]
crons = [ "4 * * * *" ]
Setting up a Cron trigger to occur every hour
To create the raw email, we use createMimeMessage. In our example below, we're only adding a short plaintext body. (See our GitHub repository for a full example on how to properly encode longer messages and HTML.)
// ...

export default {
  async scheduled(controller: ScheduledController, env: Env, ctx: ExecutionContext) {
    const new_email = createMimeMessage();

    new_email.setSender({
      name: "modabot",
      addr: "modabot@ses-email-demo-worker.testing.email.ai.moda"
    });

    new_email.setTo({
      name: "David Manouchehri",
      addr: "david@ses-email-demo-worker.testing.email.ai.moda"
    });

    new_email.setSubject("Hello, world!");

    new_email.addMessage({
      data: "Hello, world!",
      contentType: 'text/plain',
      encoding: '7bit',
      charset: '"utf-8"'
    });

    // ...
  }
};
Building the raw MIME Message
We now have a complete MIME message, and it's time to build the SESv2 SendEmail body.
// ...

function encodeBase64Bytes(bytes: Uint8Array): string {
  return btoa(
    bytes.reduce((acc, current) => acc + String.fromCharCode(current), "")
  );
}

function utf8ToBase64(str: string): string {
  return encodeBase64Bytes(new TextEncoder().encode(str));
}

export default {
  async scheduled(controller: ScheduledController, env: Env, ctx: ExecutionContext) {
    // ...

    const body = {
      Content: {
        Raw: {
          Data: utf8ToBase64(new_email.asRaw())
        }
      },
      Destination: {
        BccAddresses: [ "david@ses-email-demo-worker.testing.email.ai.moda" ],
      }
    };

    // ...
  }
};
Building the SESv2 SendEmail body
We'd like to point out why we're using BccAddresses: because it always works, and we've already defined the To field (which can be anything) in the raw MIME payload. This is incredibly useful if you want to do things like log an email to HubSpot via BCC without actually needing to send it to anyone.
Finally, our Worker is ready to send the email request to SES!
// ...

export default {
  async scheduled(controller: ScheduledController, env: Env, ctx: ExecutionContext) {
    // ...

    const aws_client = new AwsClient({
      accessKeyId: env.AWS_SES_ACCESS_KEY_ID,
      secretAccessKey: env.AWS_SES_SECRET_ACCESS_KEY,
      service: 'ses',
      retries: 0,
    });

    const ses_prom = aws_client.fetch(`https://email.${env.AWS_SES_REGION}.amazonaws.com/v2/email/outbound-emails`,
      {
        body: JSON.stringify(body),
        headers: {
          'Content-Type': 'application/json'
        },
      }).then(async (res) => {
        if(!res.ok) {
          console.error(`SES response not ok: ${res.status}`);
          if(res.body) {
            console.error(`SES response body: ${await res.text()}`);
          }
          throw new Error(`SES response not ok: ${res.status}`);
        }
        else {
          console.debug(`SES response ok: ${res.status}`);
          const res_json = await res.json();
          console.debug(`SES response body: ${JSON.stringify(res_json)}`);
        }
      });

    ctx.waitUntil(ses_prom);
  }
};
Sending an email via AWS SES API v2 using aws4fetch
We've set retries: 0 to avoid sending duplicate emails by accident. (In production, a good practice would be store the SES events from SNS in an S3 bucket or database, and have this Worker check if the message you're built has already been sent, before retrying.)
While it won't do anything at the moment (since we haven't covered the AWS IAM setup yet), let's deploy the Worker before we forget. Simply run:
wrangler deploy -e productionDeploying/uploading our Worker to Cloudflare
AWS SES IAM Configuration
This is probably the hardest section for most folks new to AWS, so we've decided to document it well with screenshots.
Step 1: Create a new user.
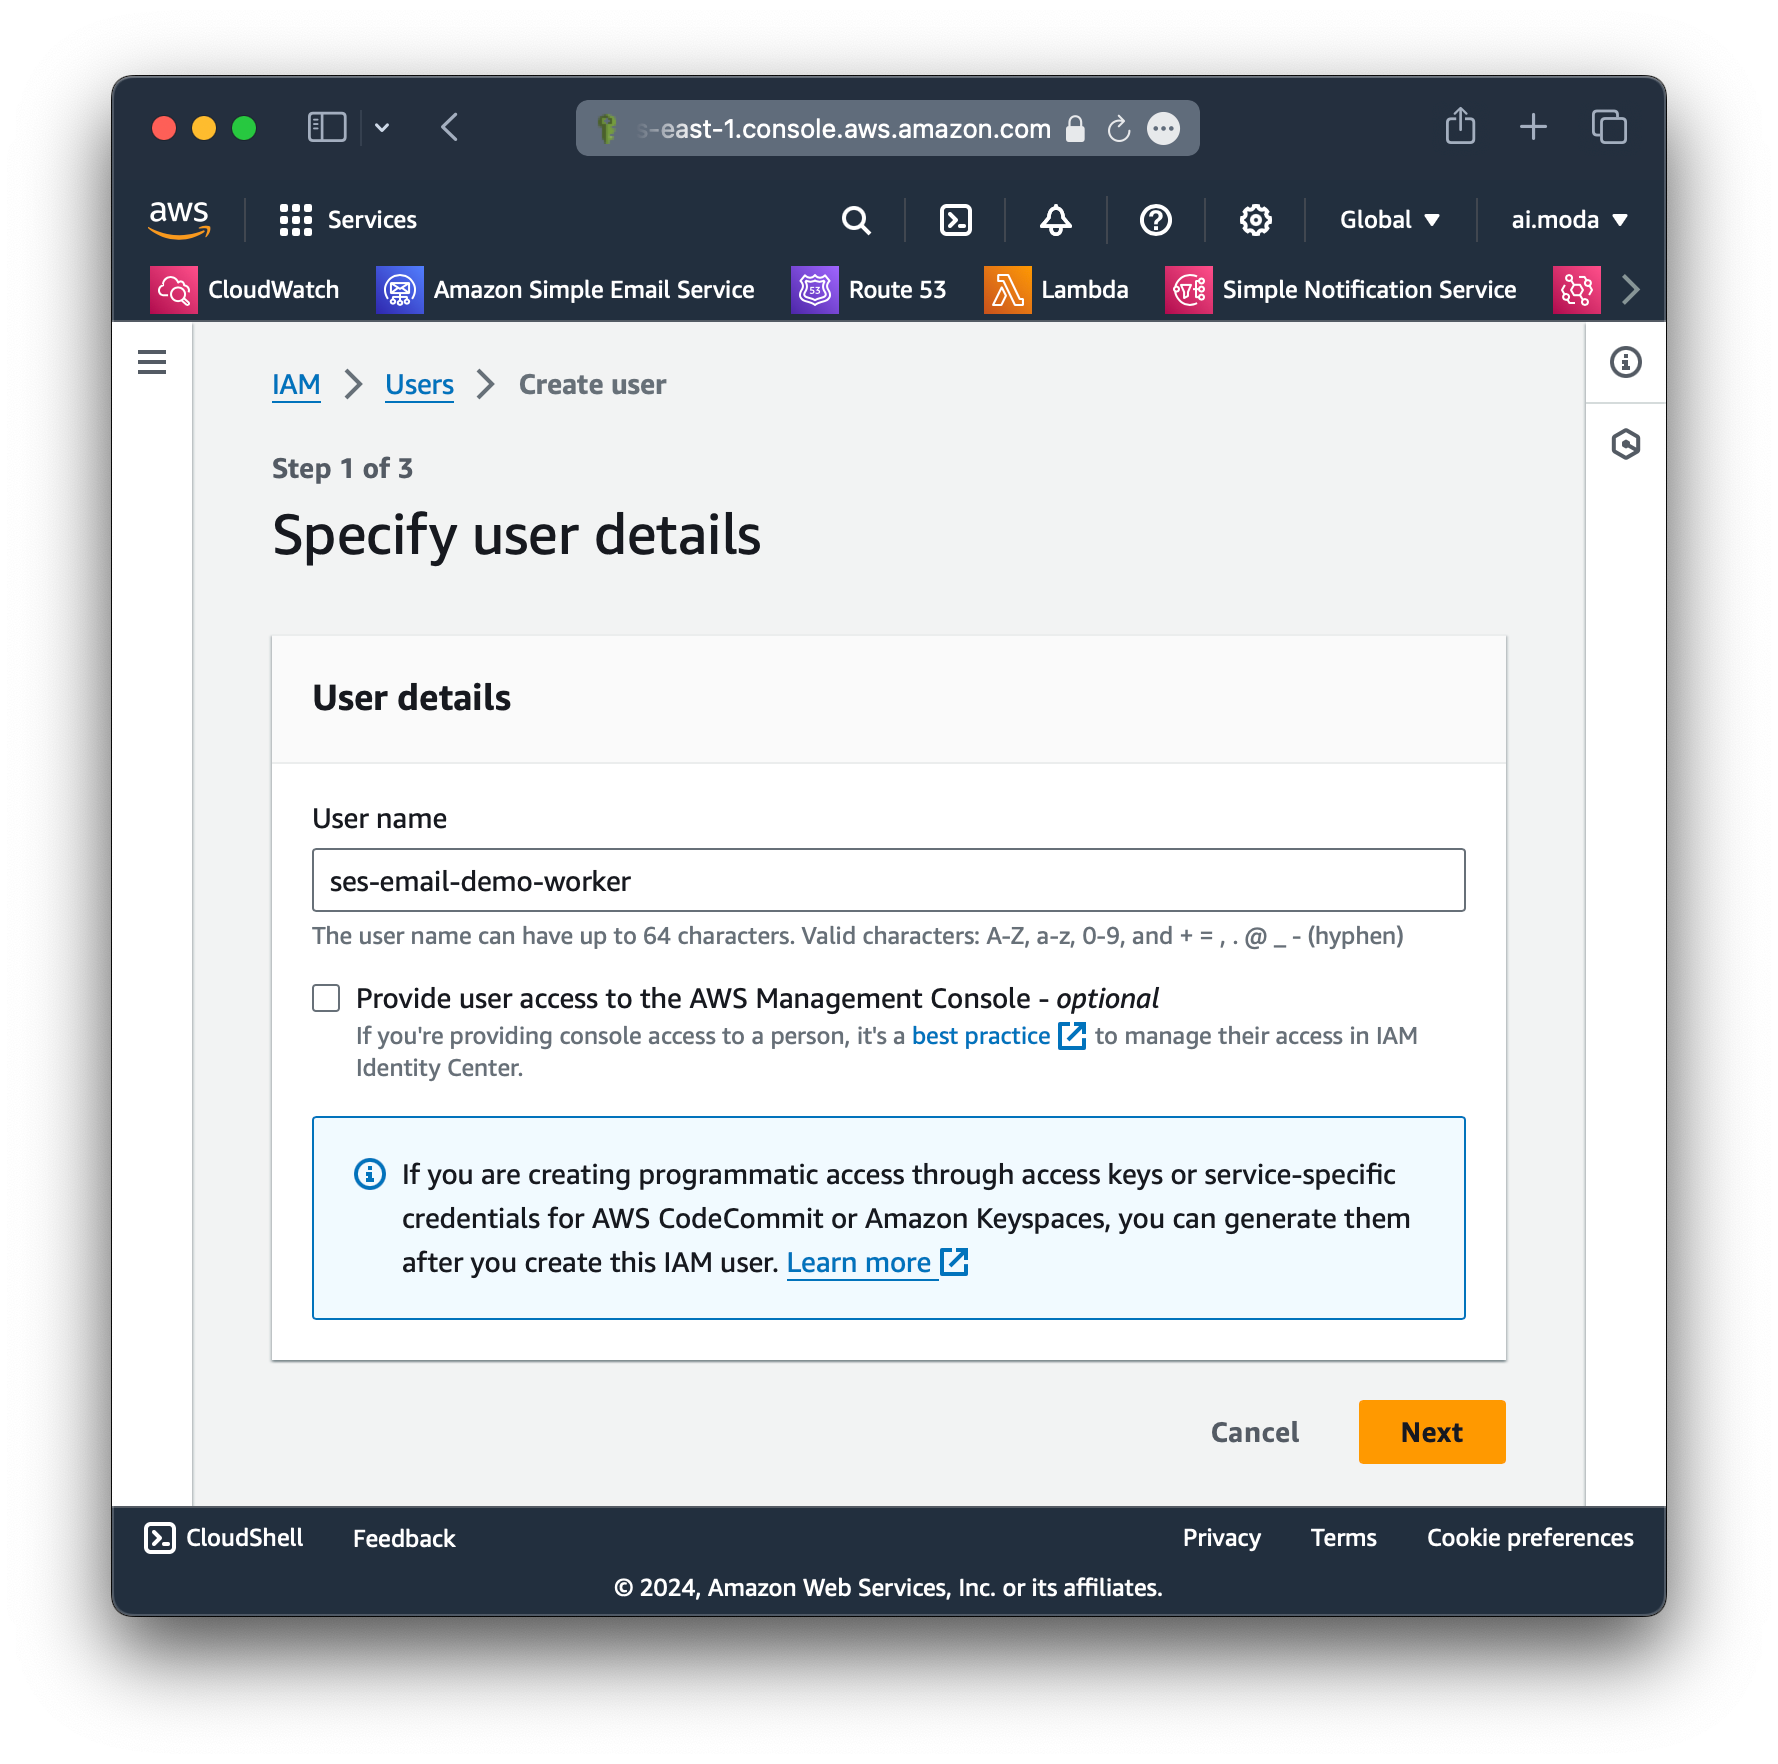
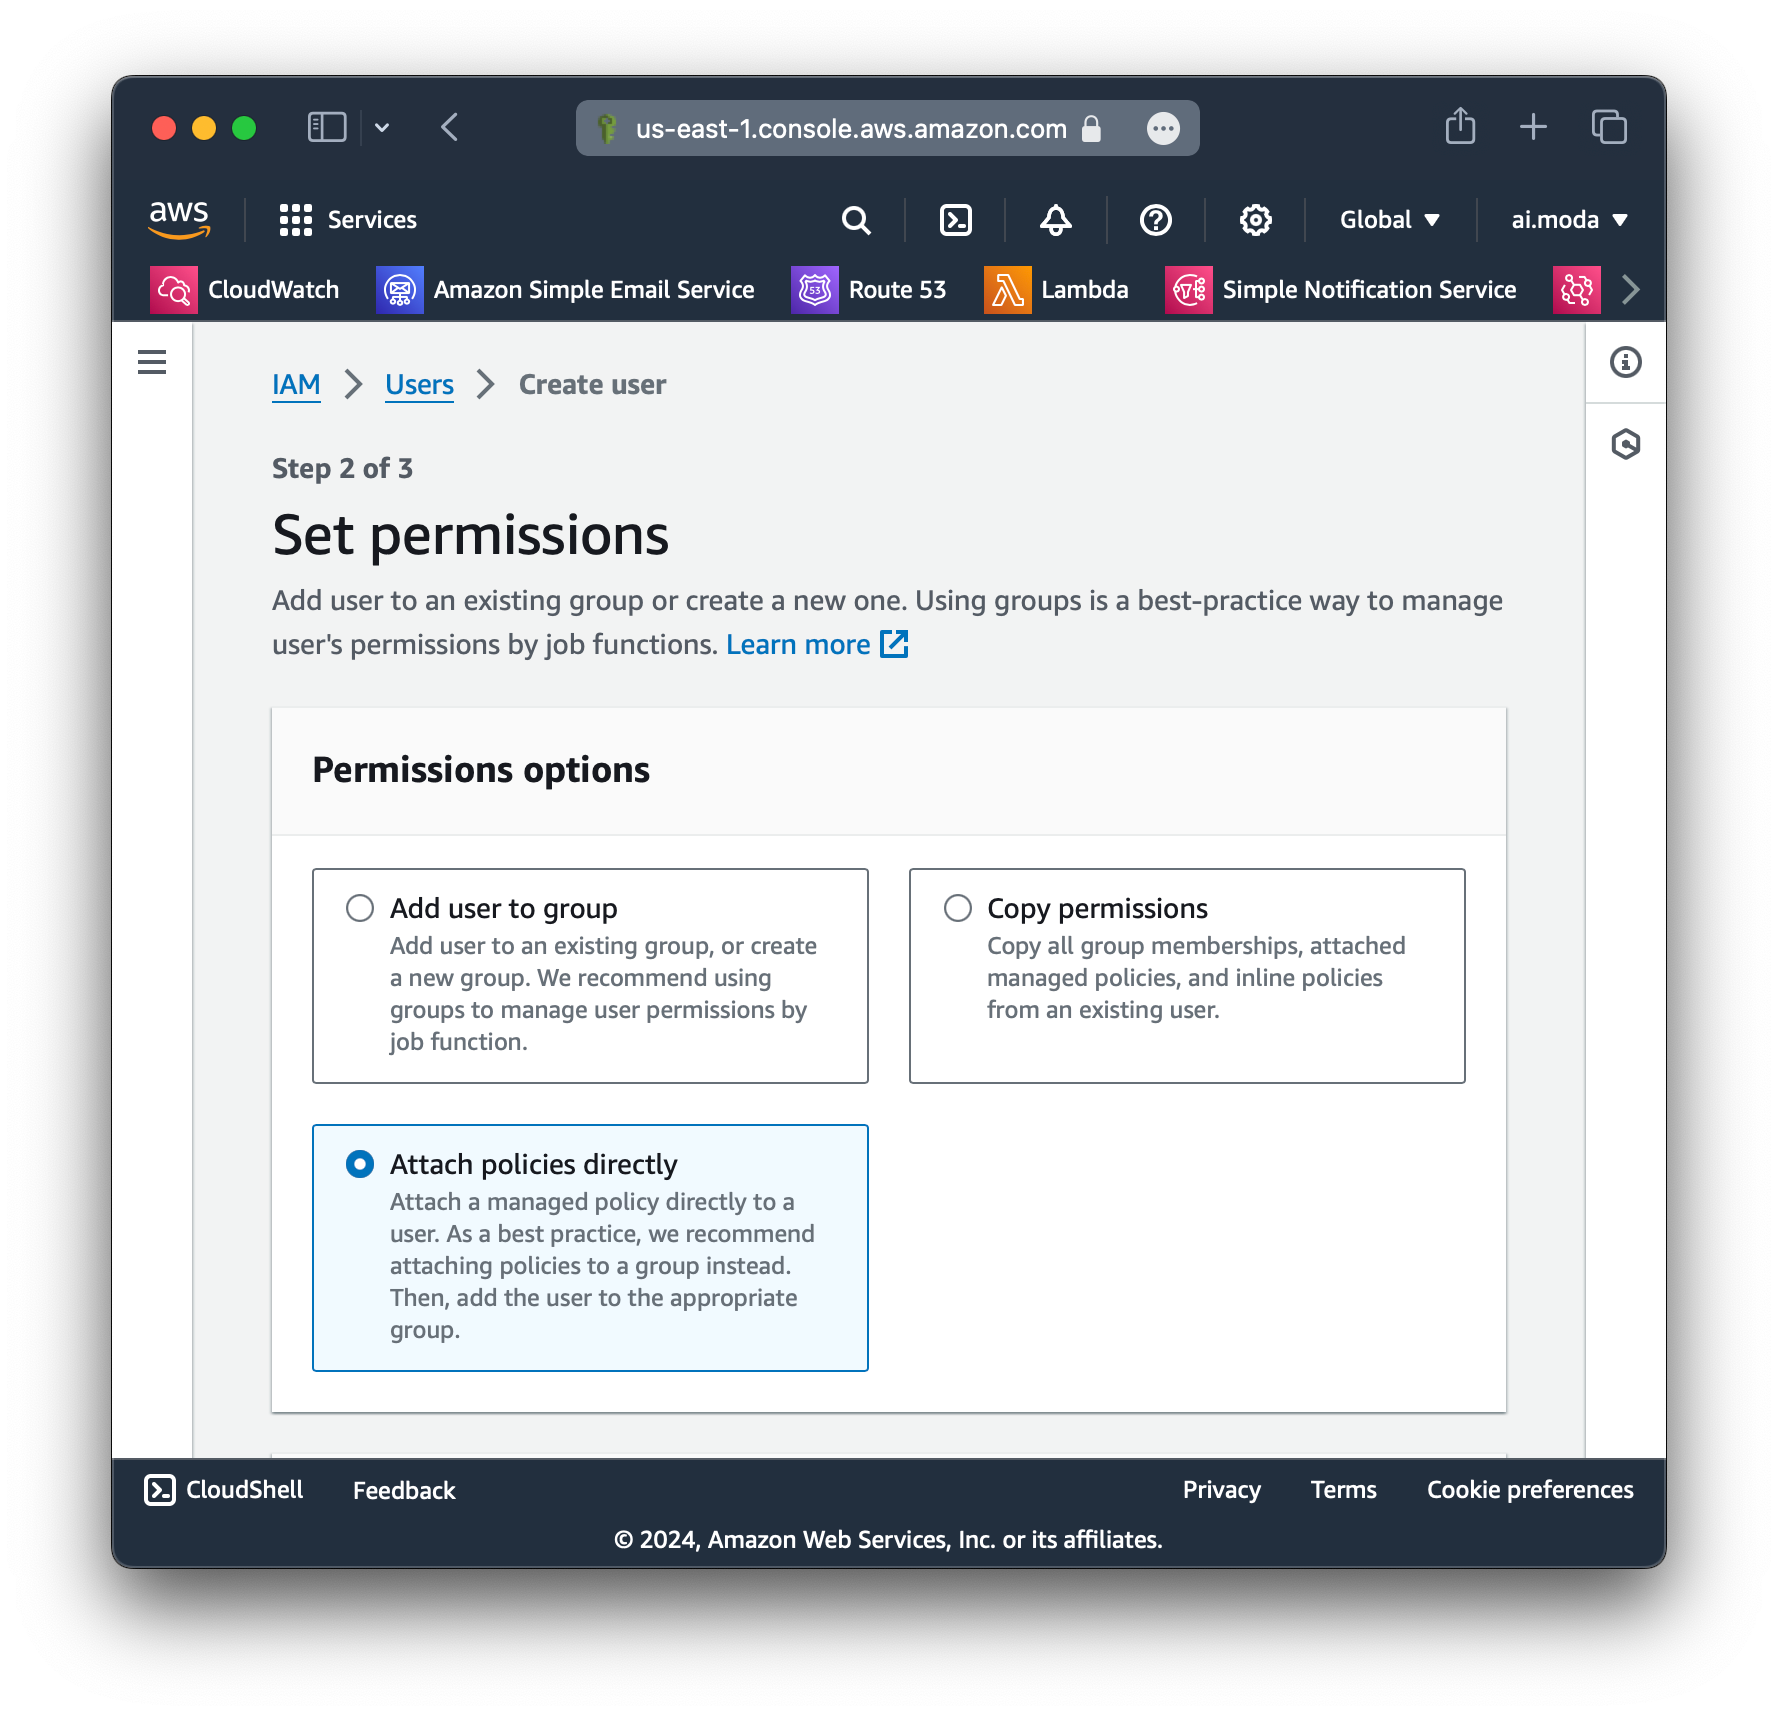
ses-email-demo-workerStep 2: For now, don't attach any policies or permissions to the user (we will do this later).
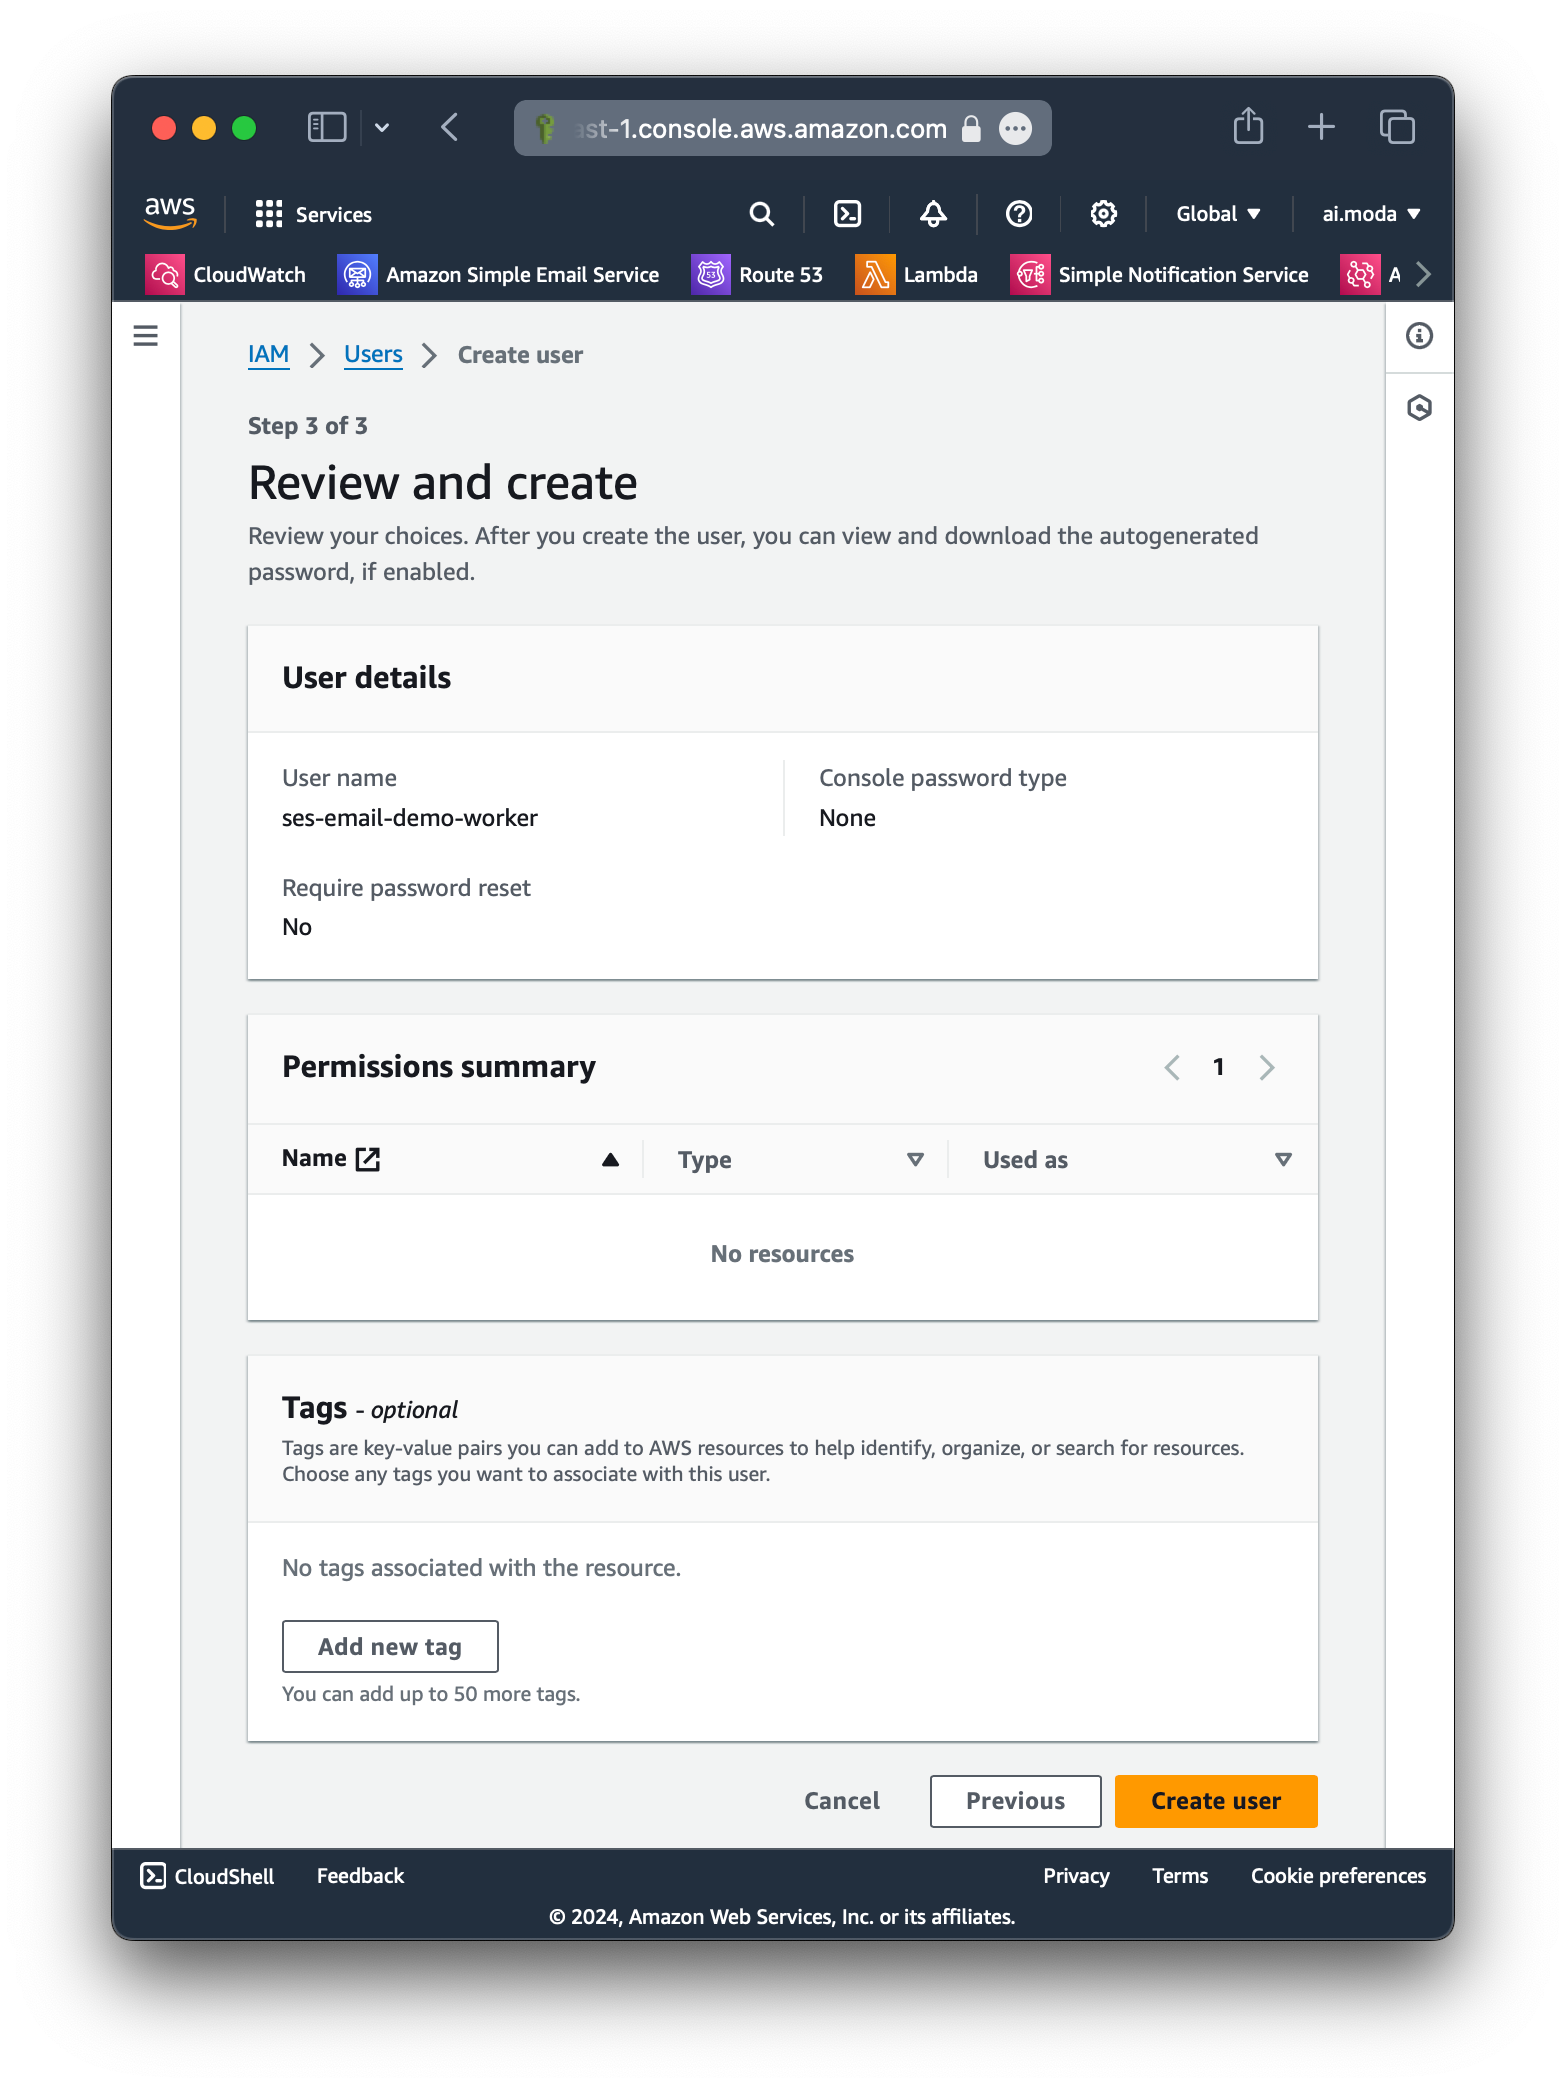
Step 3: Confirm that no policies or permissions were attached.
Step 4: Click Create inline policy on the the user we just created.
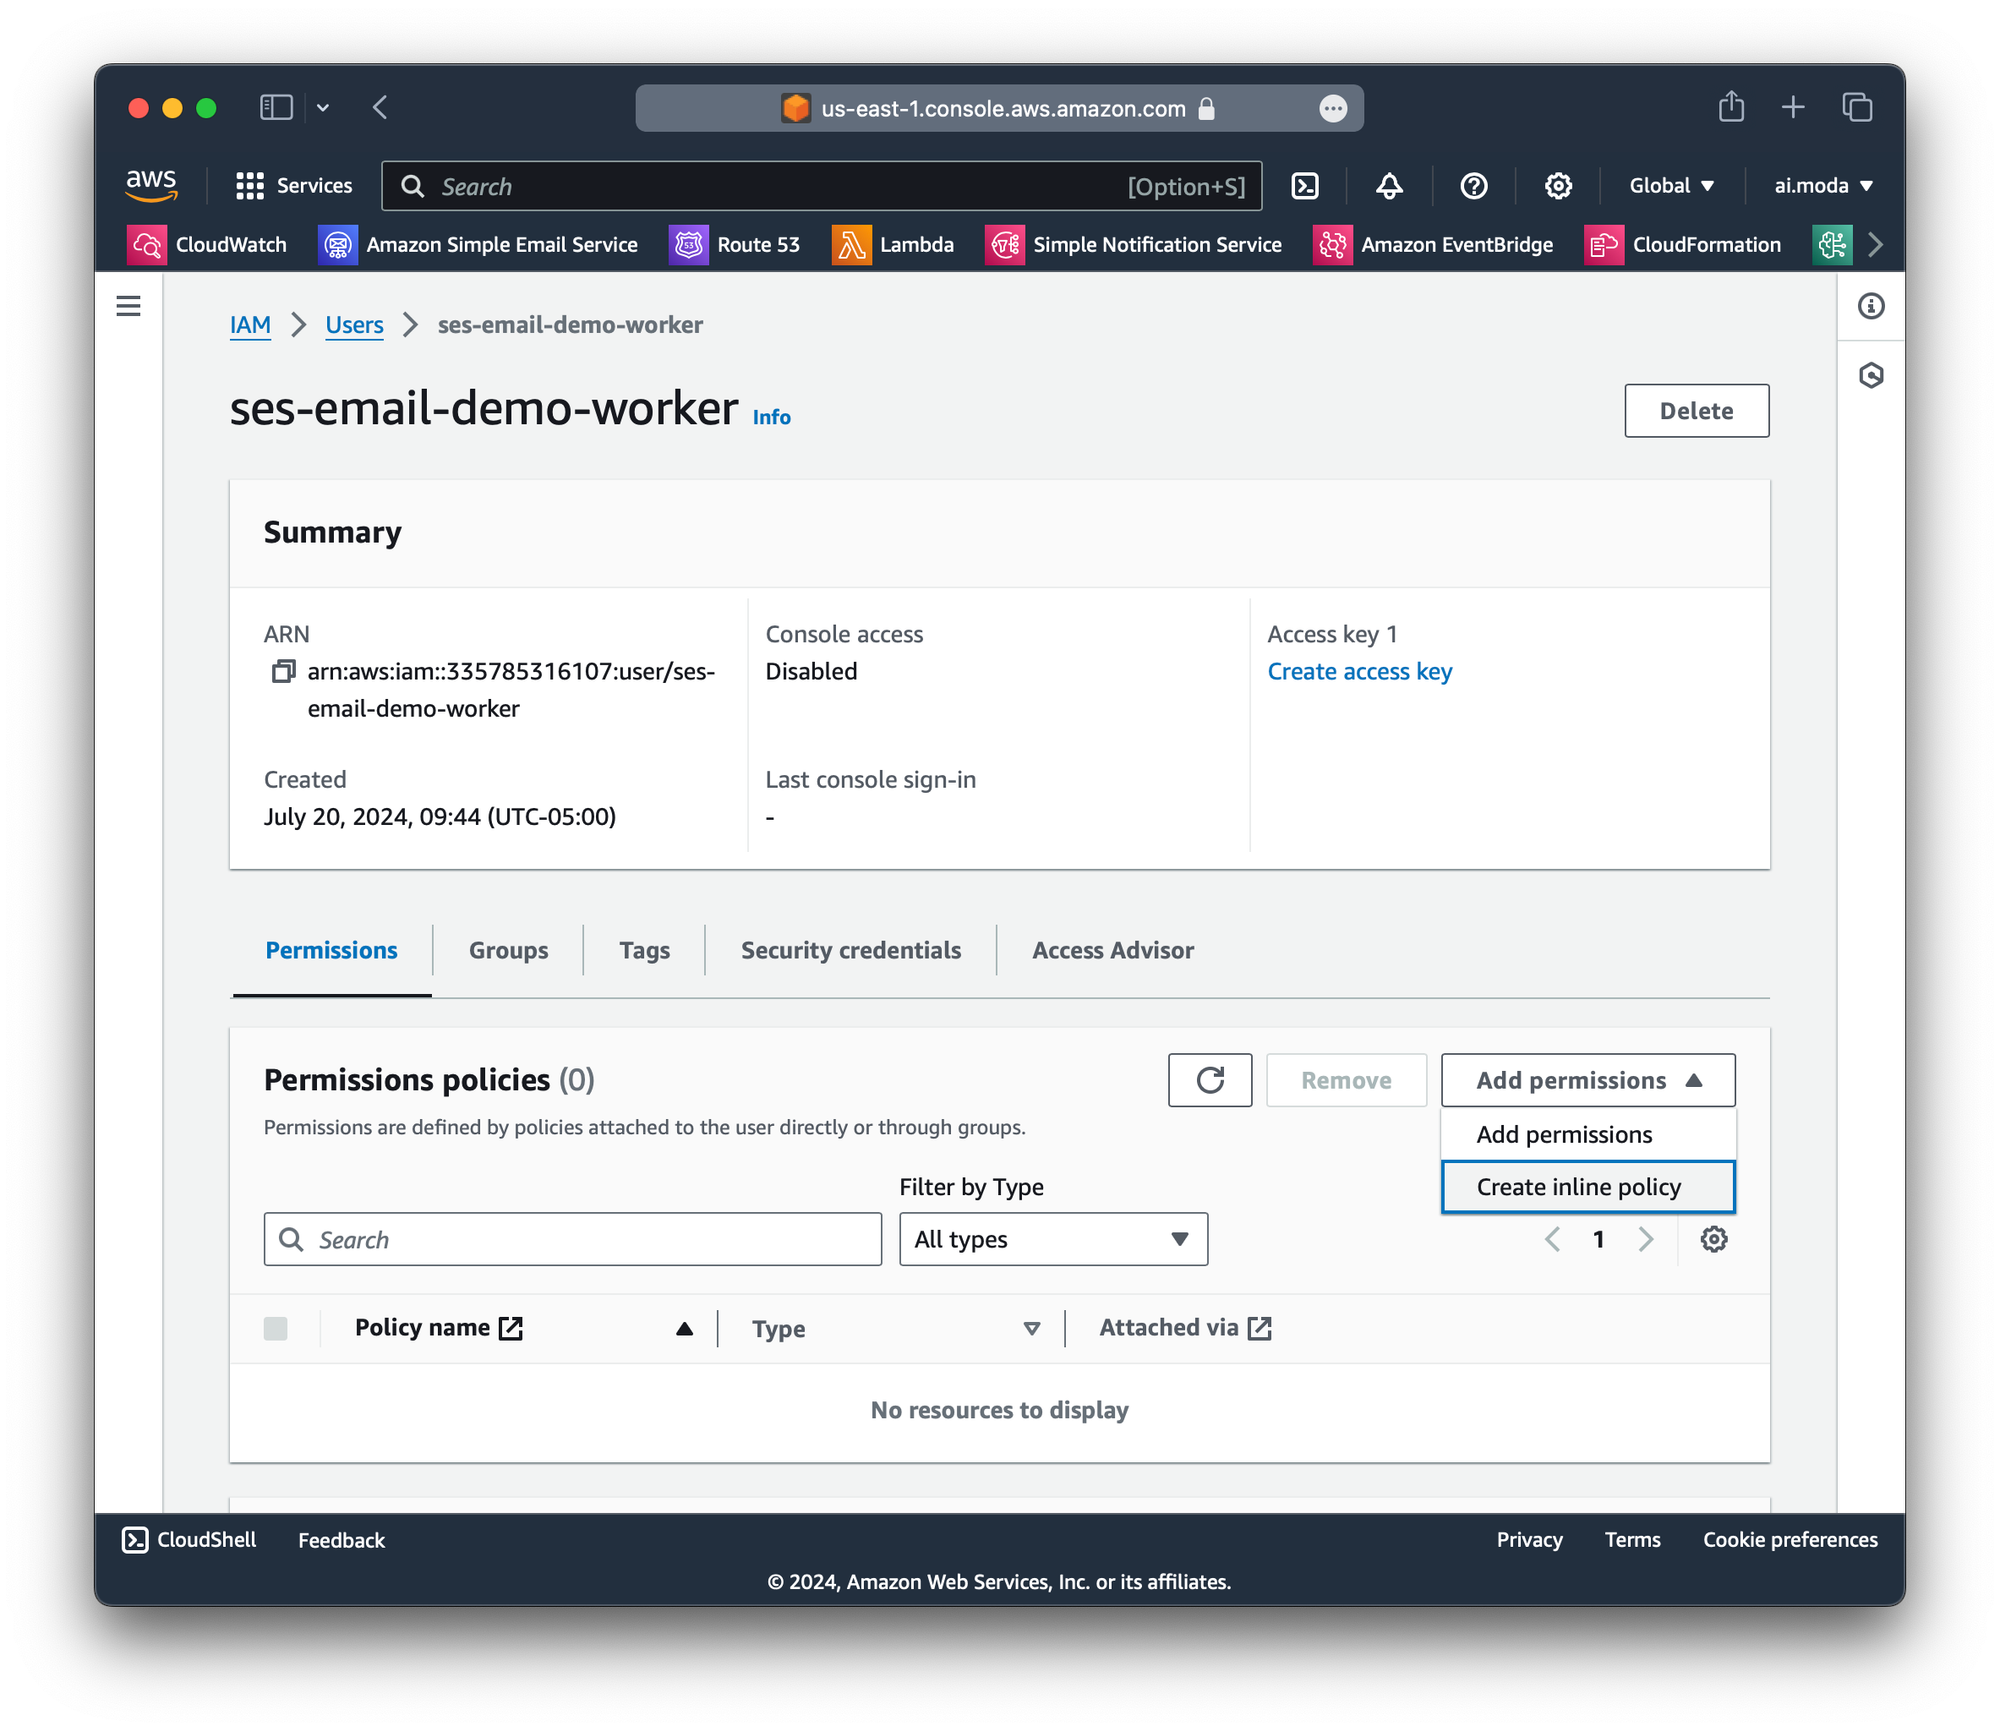
Create inline policyStep 5: Create a JSON policy. We recommend you start with this, and modify it to suit your needs.
{
  "Version": "2012-10-17",
  "Statement": [
    {
      "Effect": "Allow",
      "Action": "ses:SendRawEmail",
      "Resource": "*",
      "Condition": {
        "StringEquals": {
          "ses:FromDisplayName": "modabot",
          "ses:FromAddress": "modabot@ses-email-demo-worker.testing.email.ai.moda",
          "ses:ApiVersion": "2"
        },
        "ForAllValues:StringLike": {
          "ses:Recipients": [
            "*@ses-email-demo-worker.testing.email.ai.moda"
          ]
        },
        "Bool": {
          "aws:SecureTransport": "true"
        }
      }
    }
  ]
}
Example Safe Starter Policy
This policy enforces:
- Only
ses:SendRawEmailcan be called. (Confusingly this is the correct condition to set, even though we're usingSendEmailfrom SES v2.) - The sender must be
modabot <modabot@ses-email-demo-worker.testing.email.ai.moda>. It is extremely import to restrict the display name too (and not just the address), as this helps reduce the effectiveness of a phishing campaign if an attacker ever gained access to this AWS IAM user. - Enforce SES v2 to be used, i.e. blocking SES v1's
SendRawEmail. - Only allow sending emails to addresses that match
*@ses-email-demo-worker.testing.email.ai.moda. - Enforce HTTPS.
Paste your modified policy into the JSON Policy editor text field.
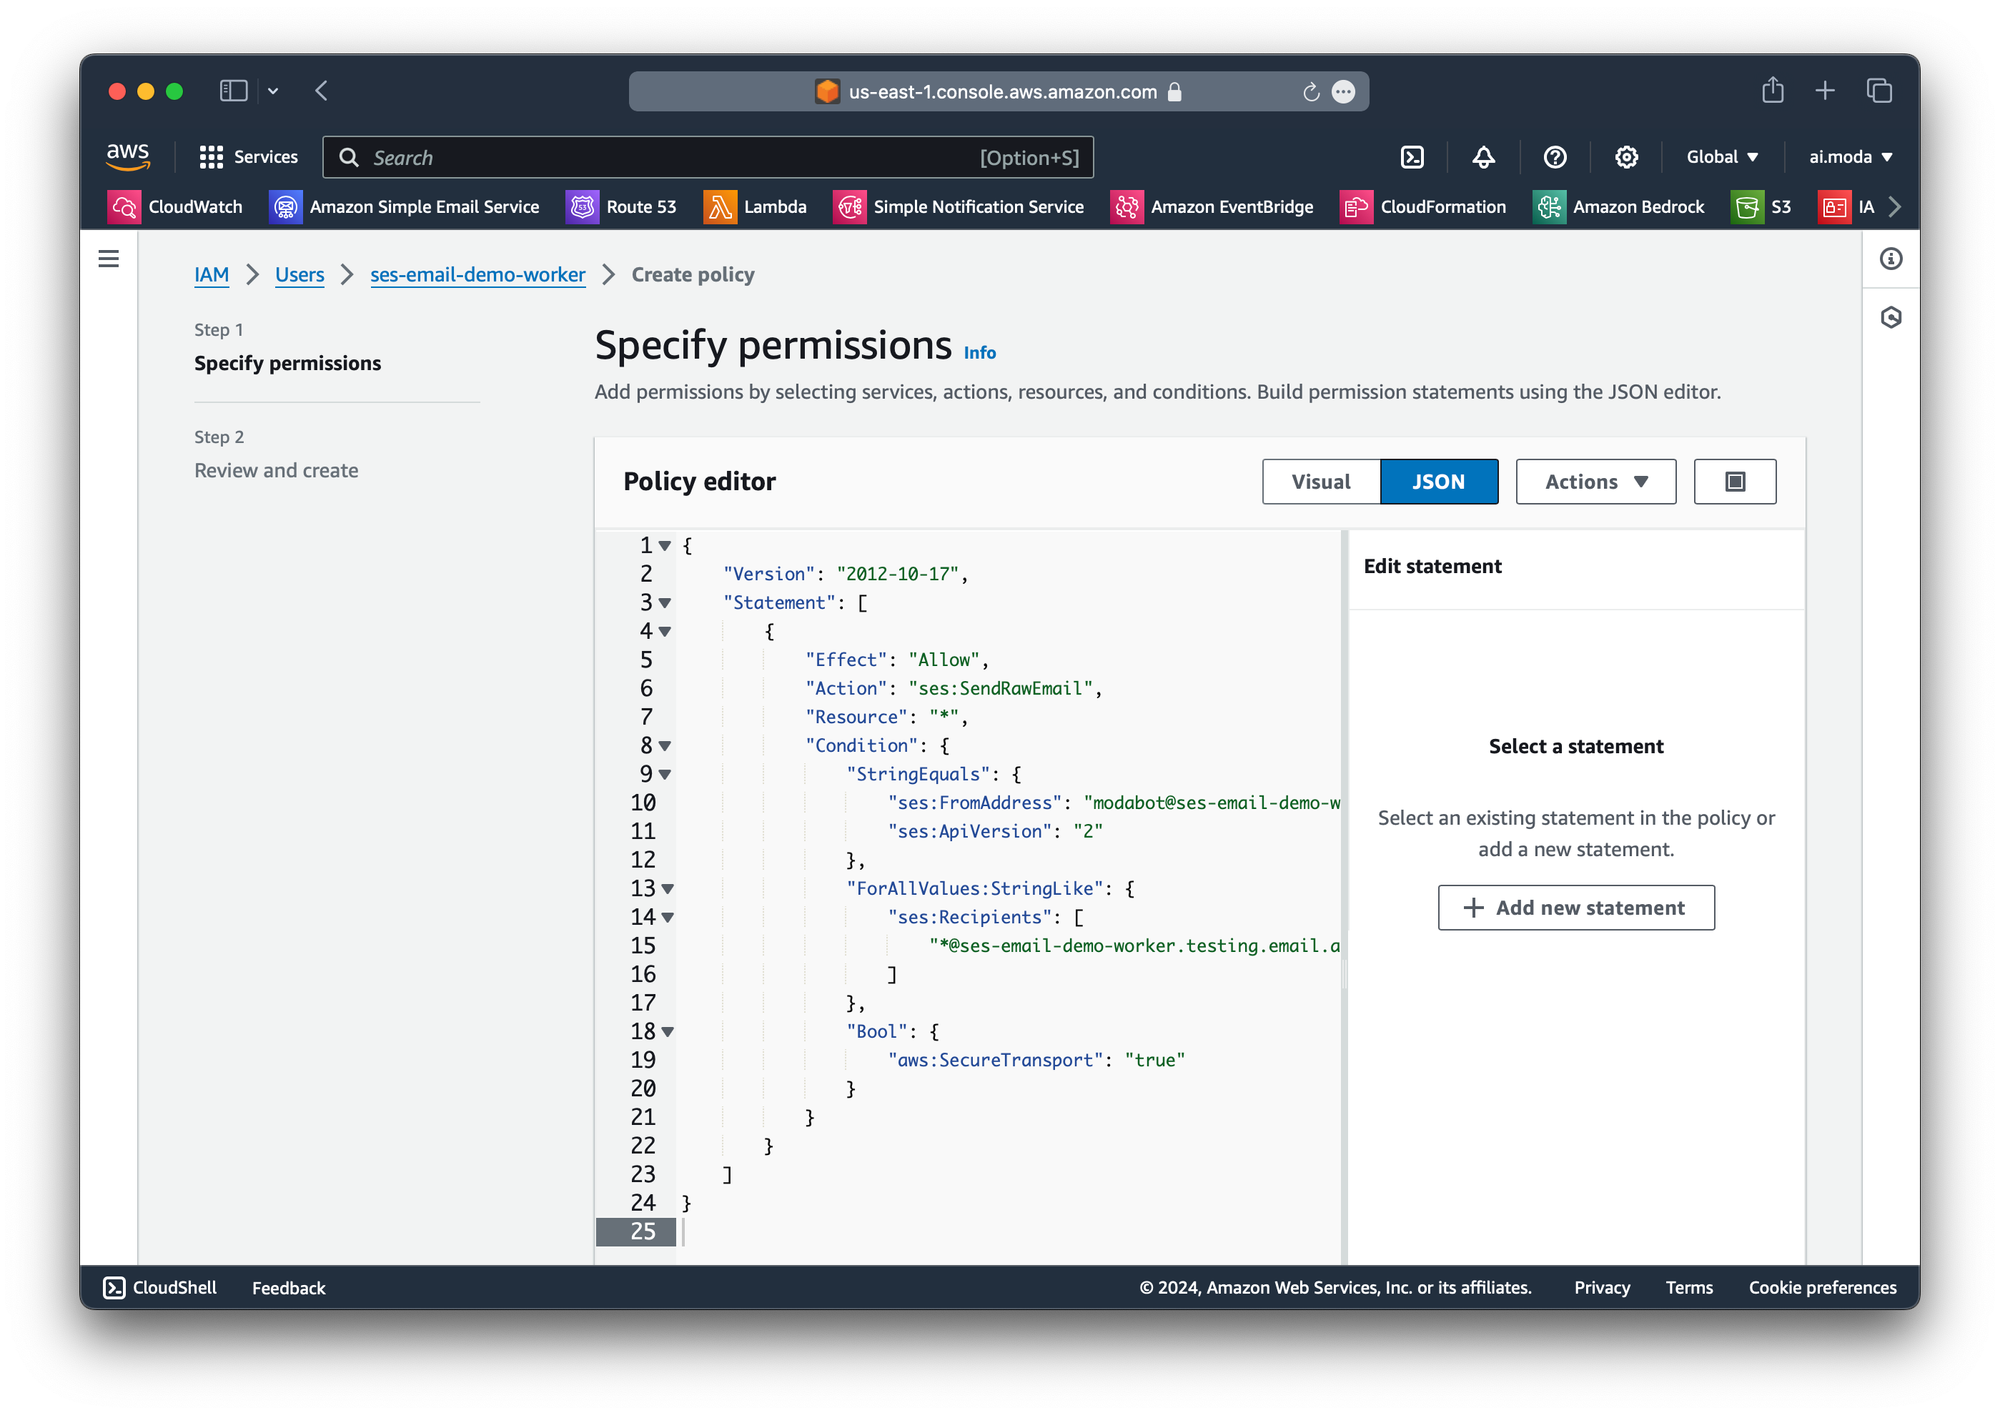
Step 6: Give a name to this policy, then review and create it.

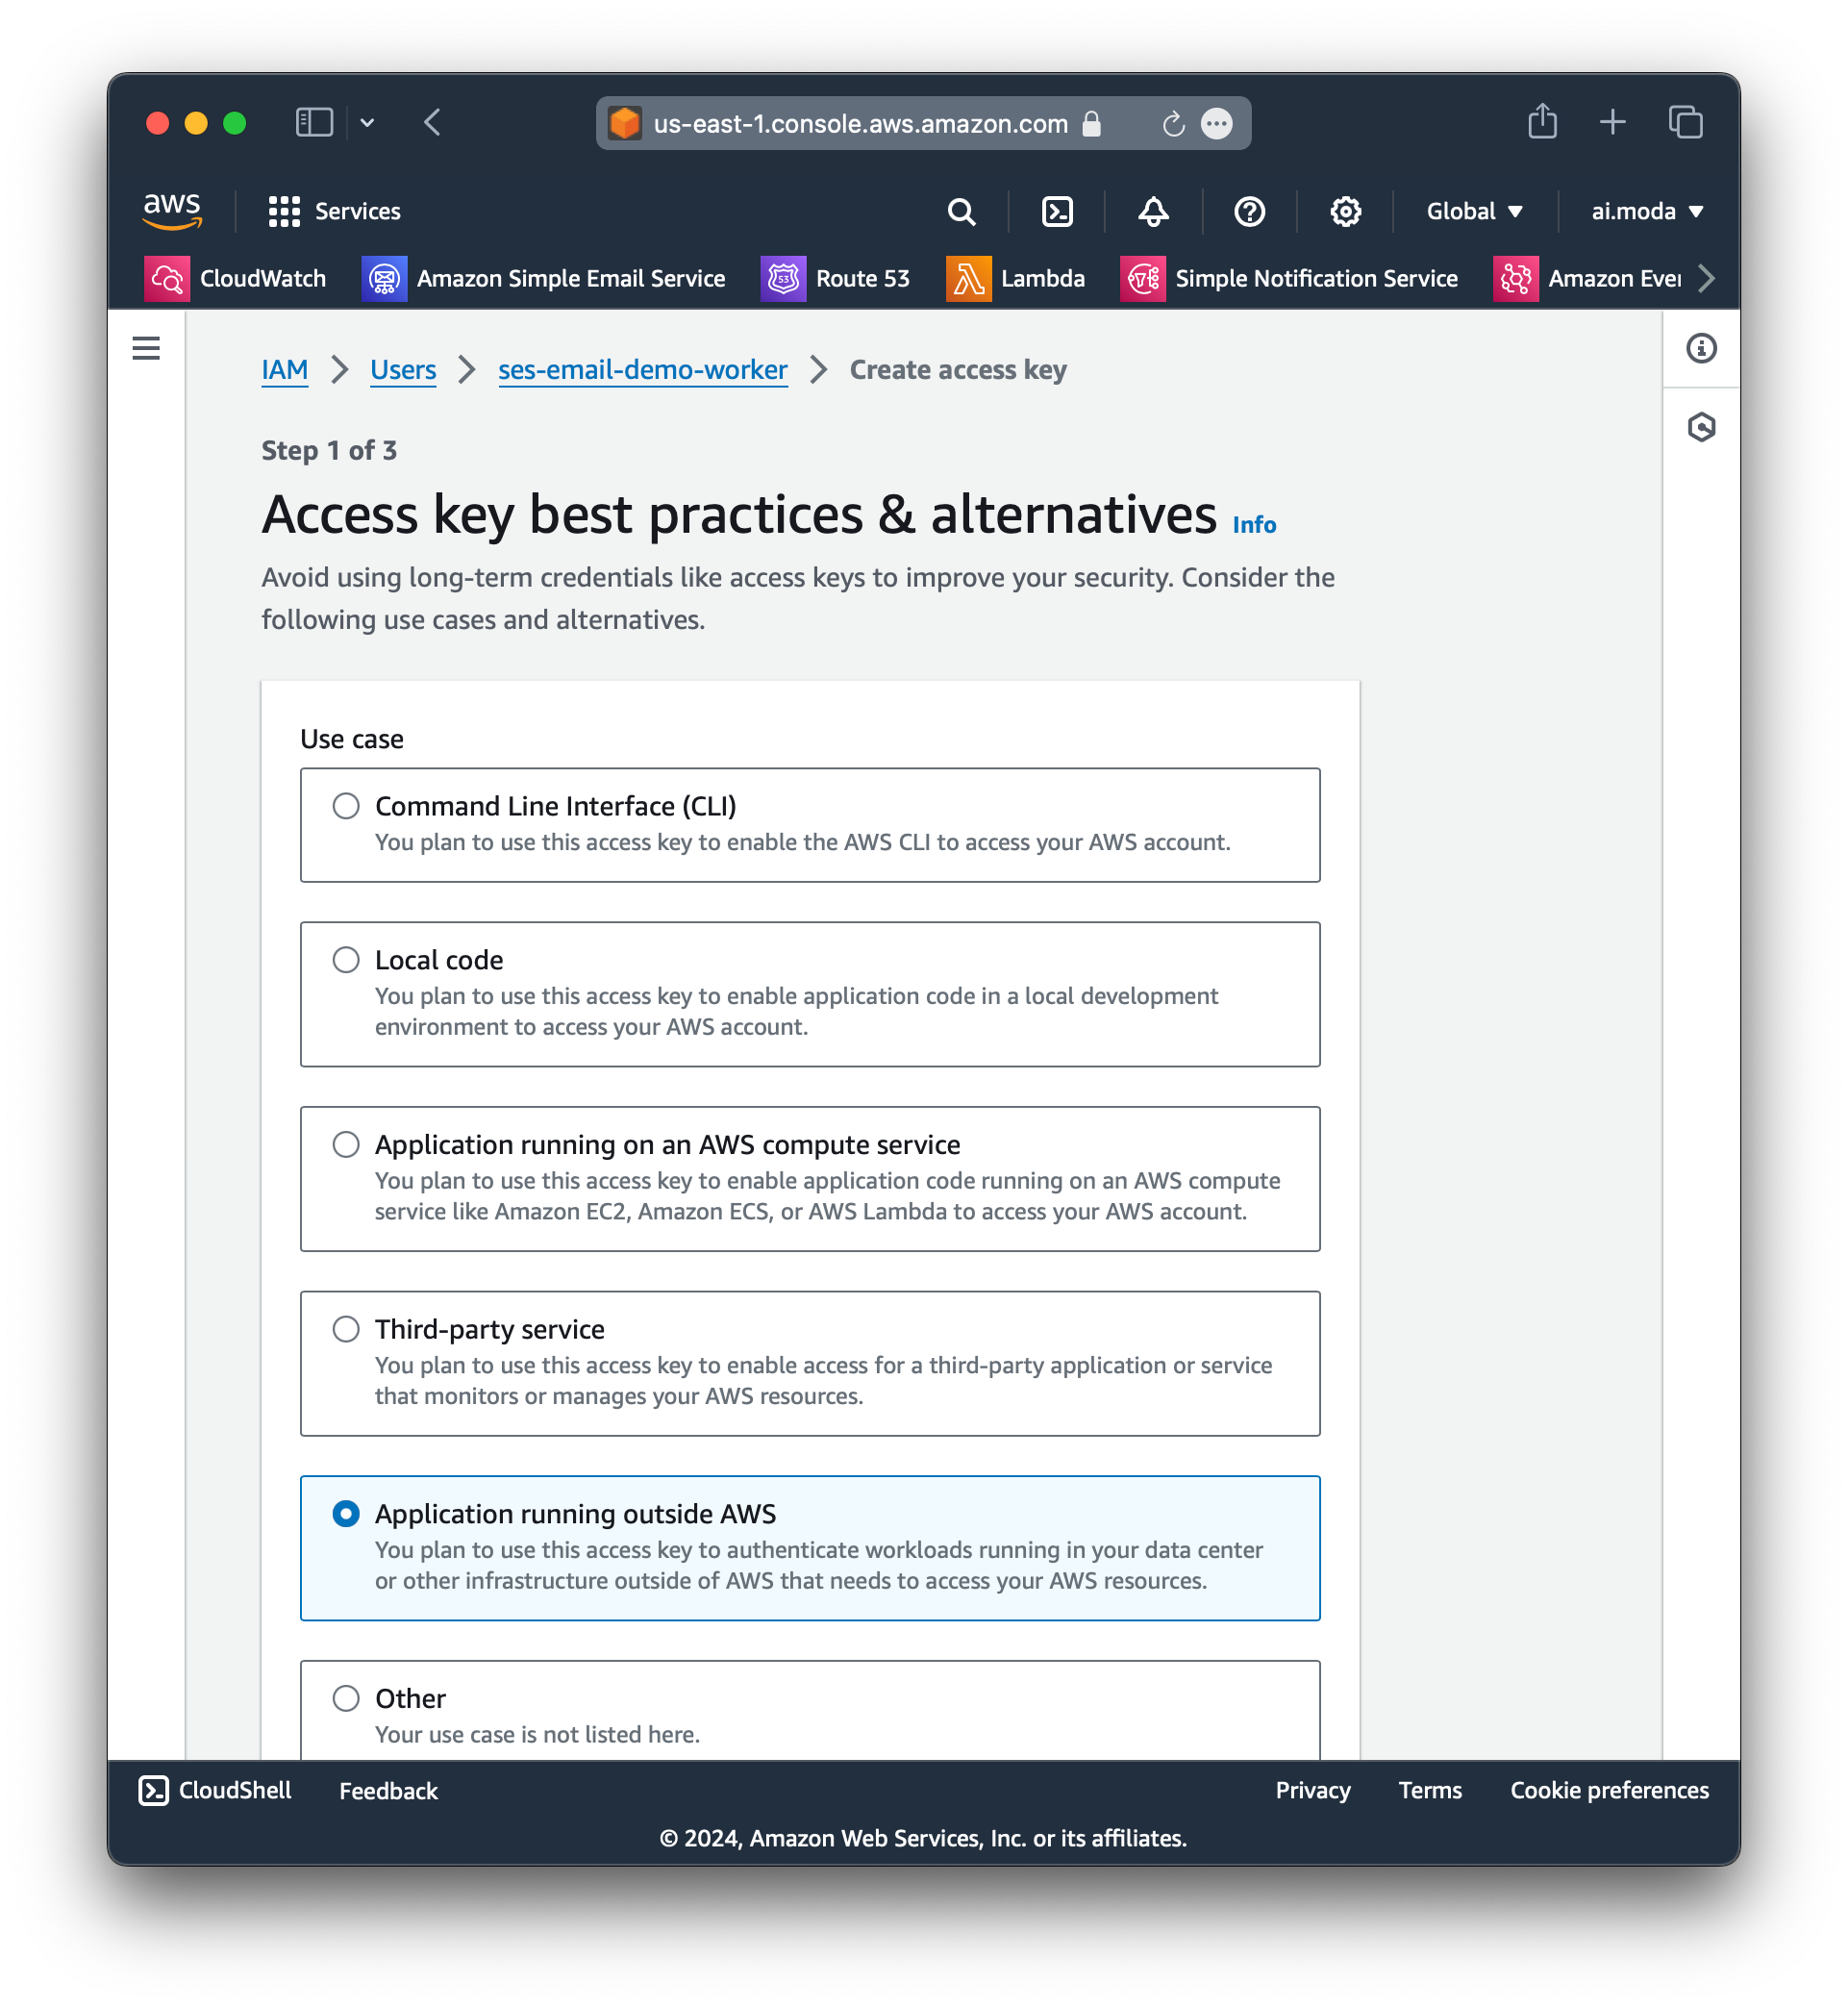
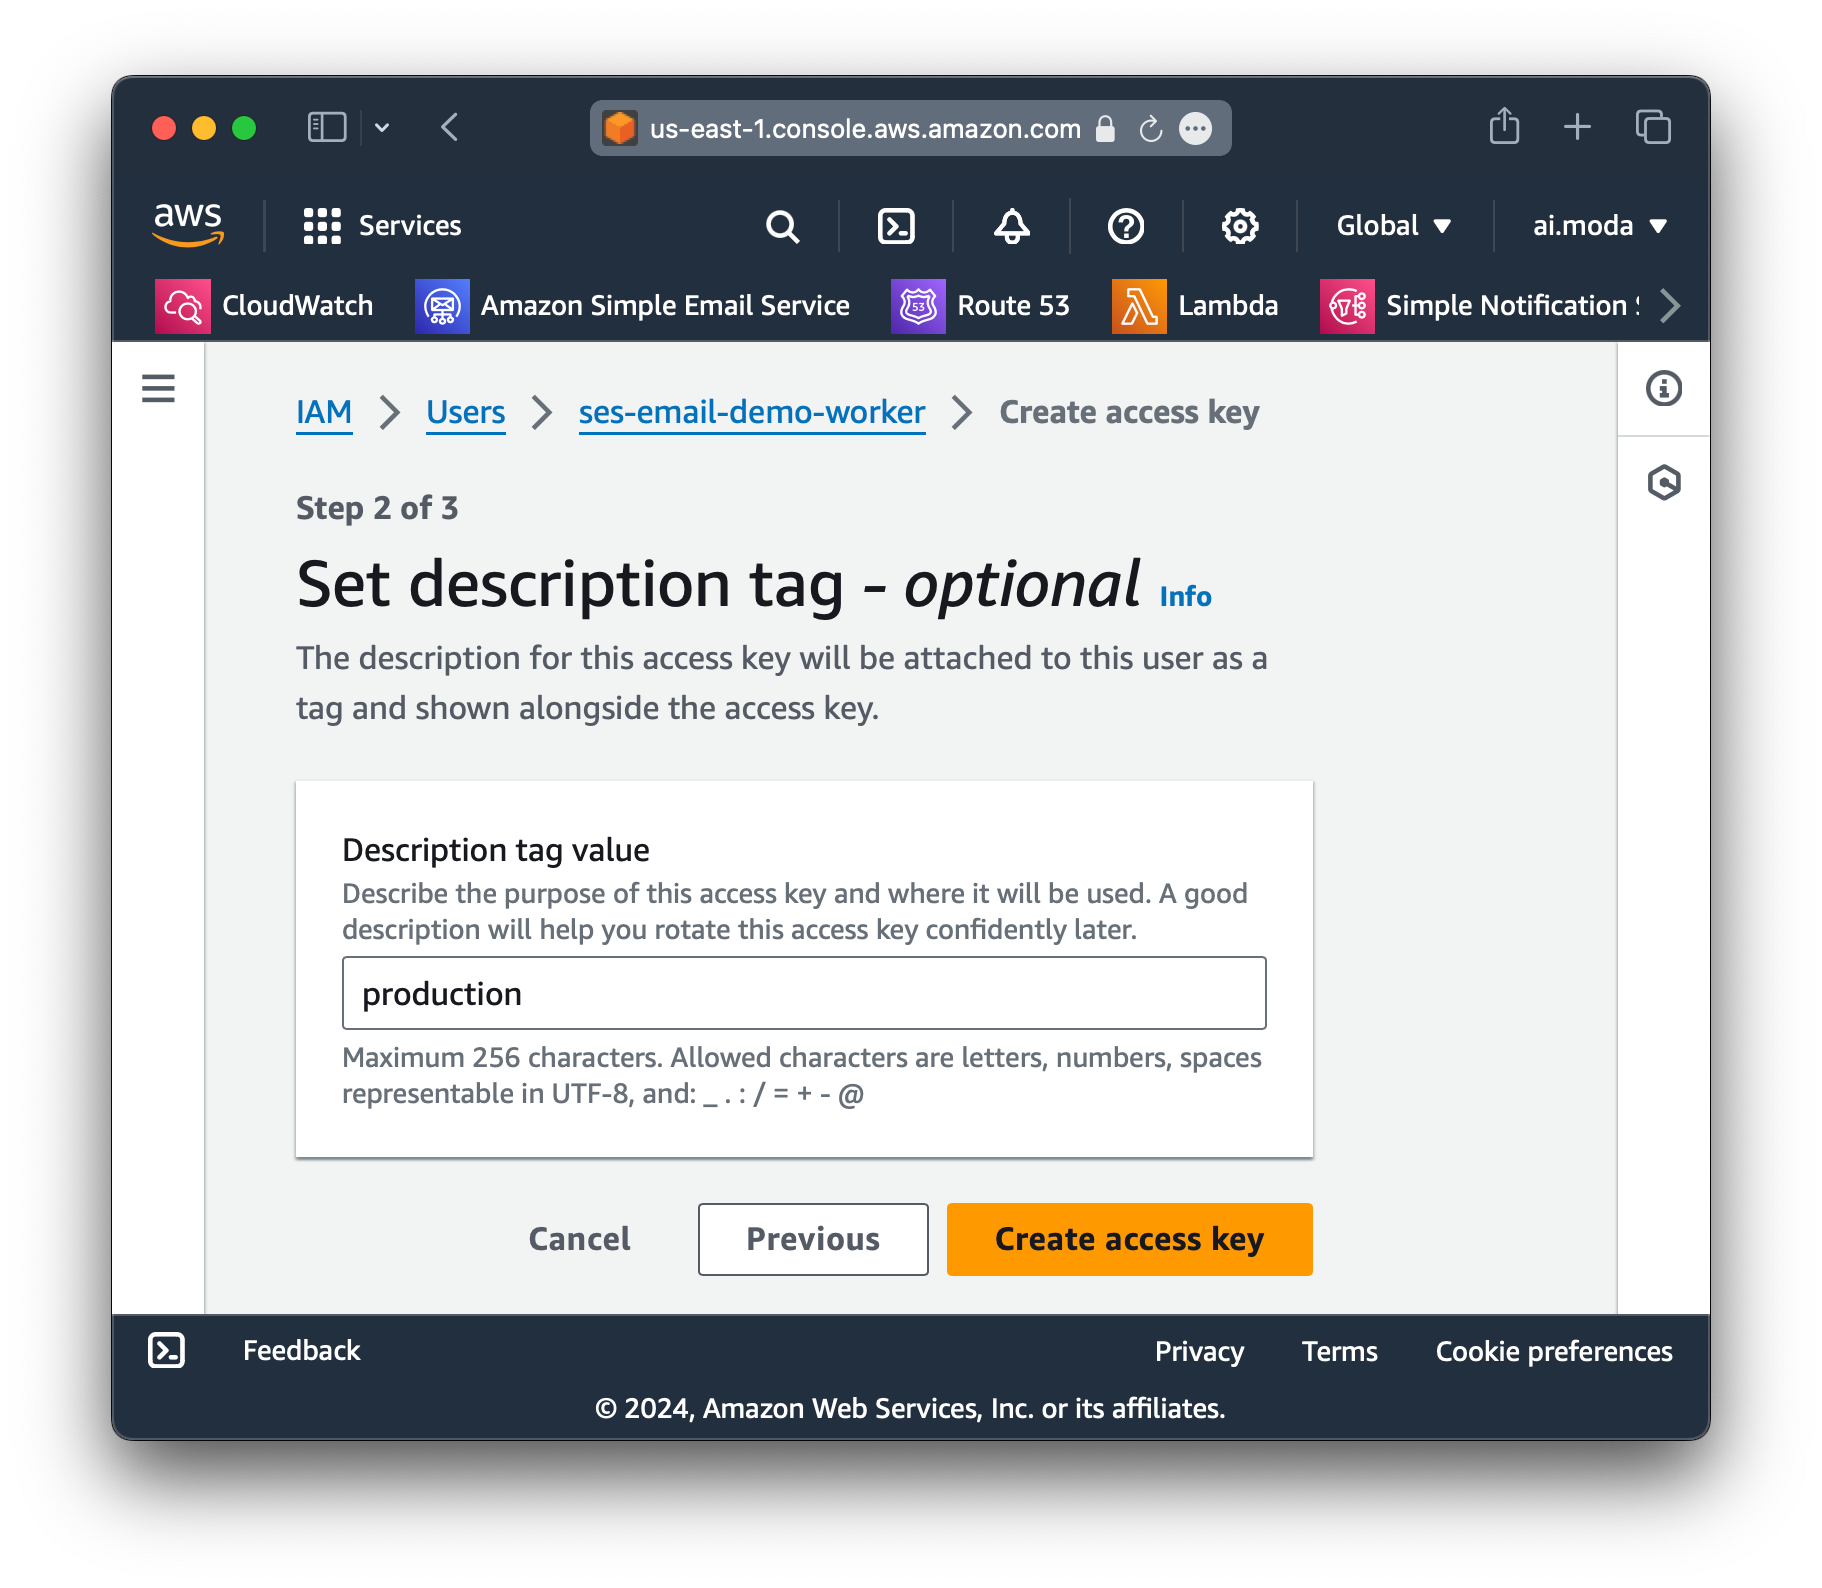
Step 7: Create the first access key for this user, which we will use for local dev testing.
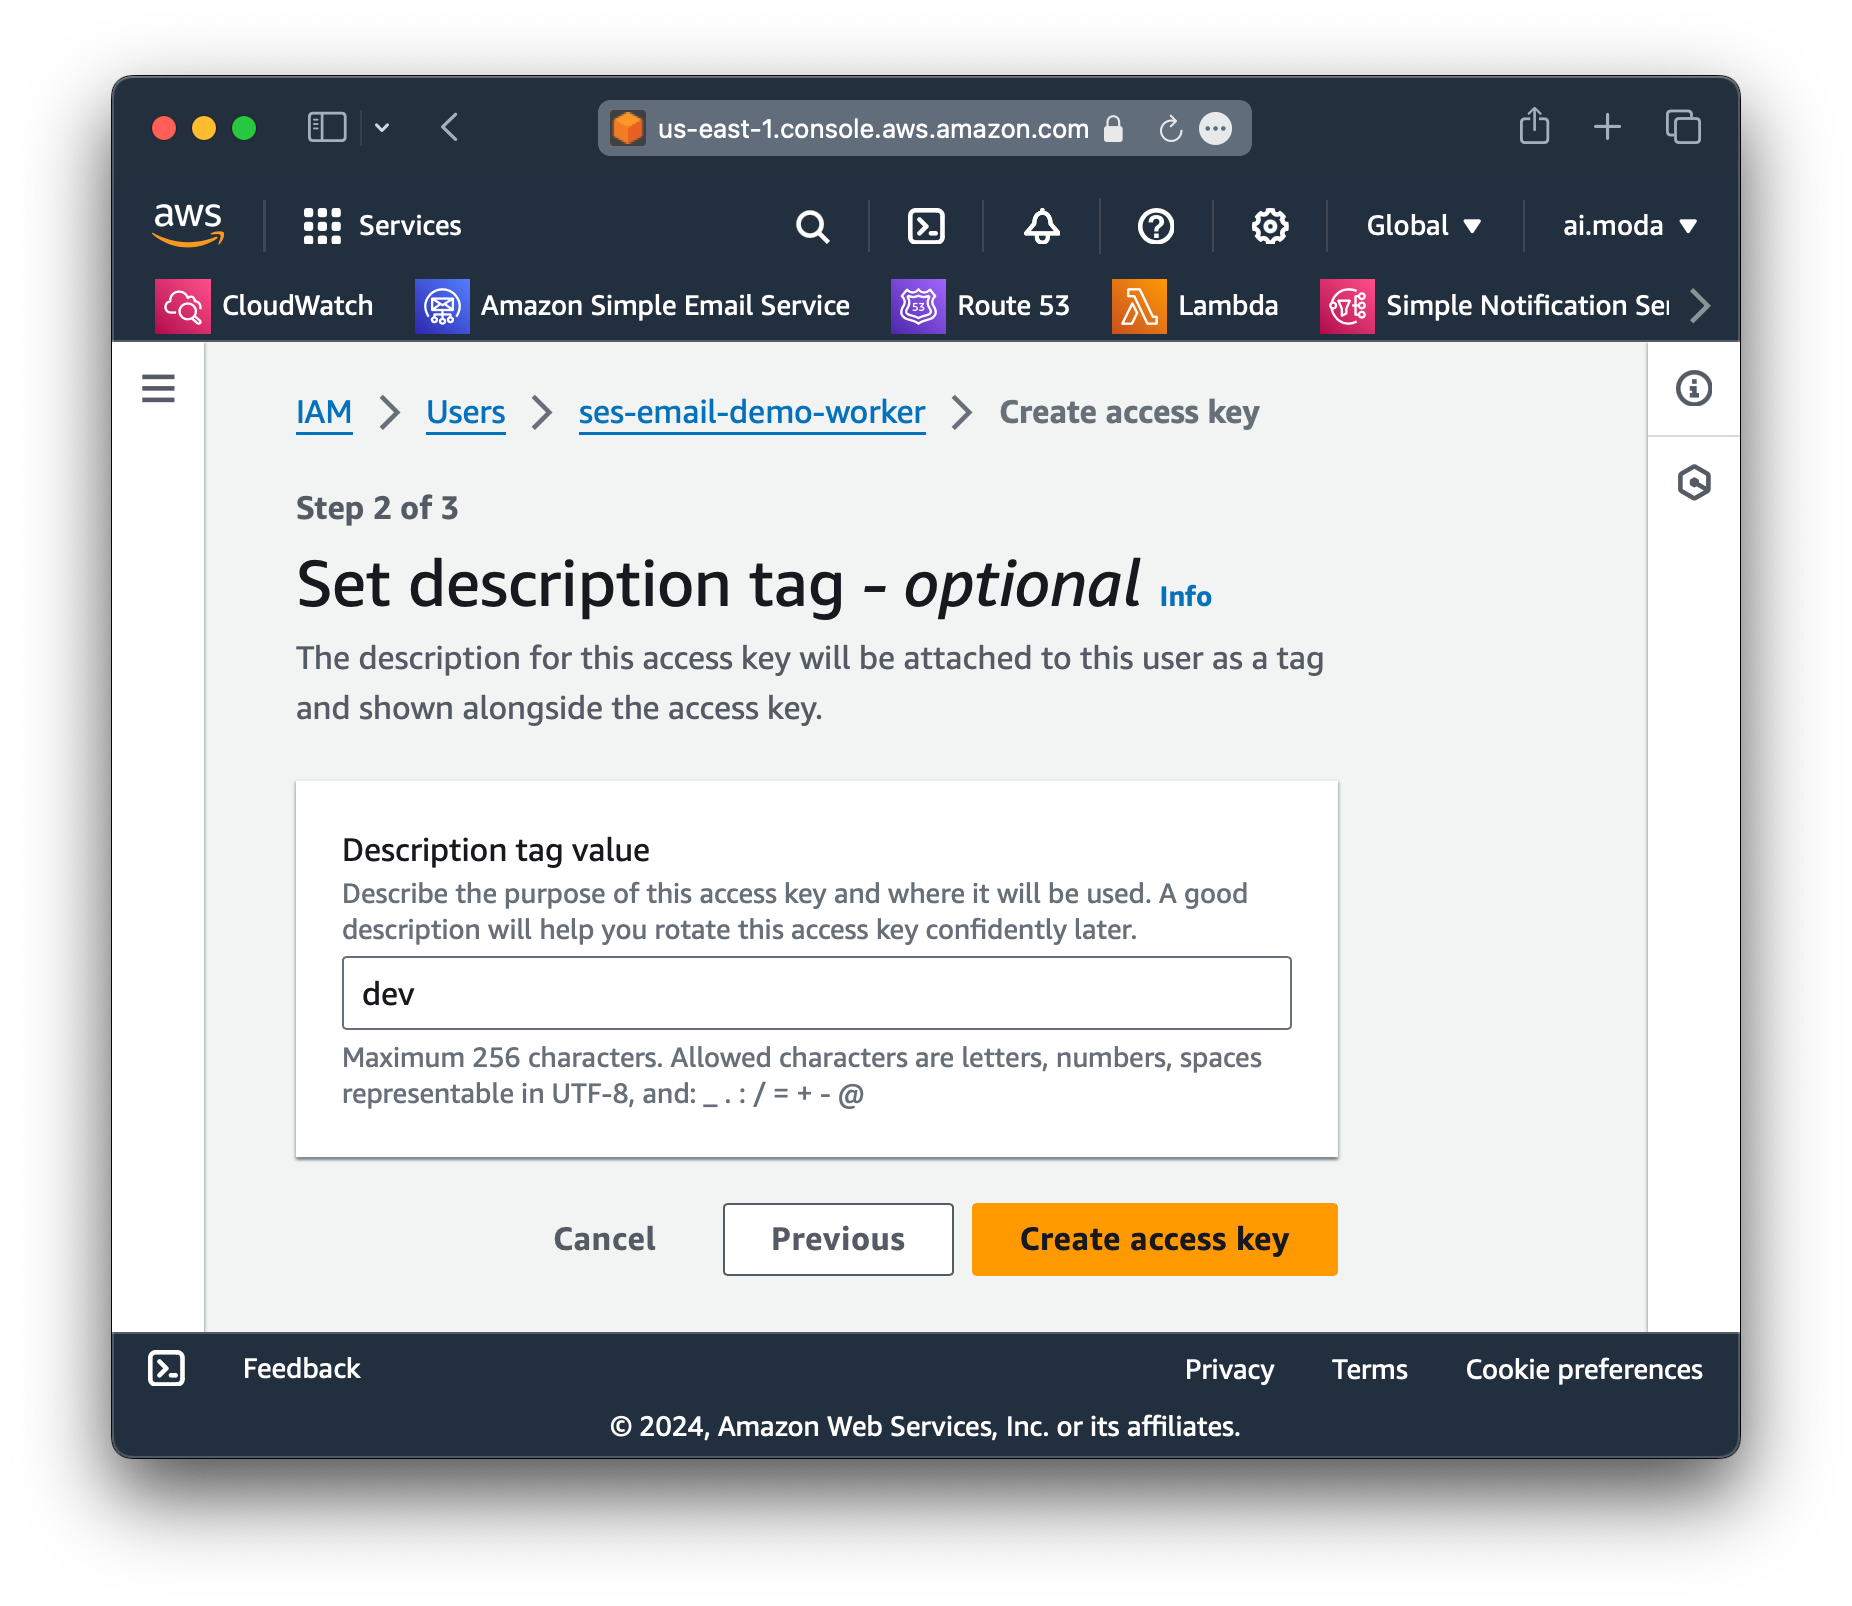
Step 8: Give this access key the tag of dev so we can identity the purpose of it later.
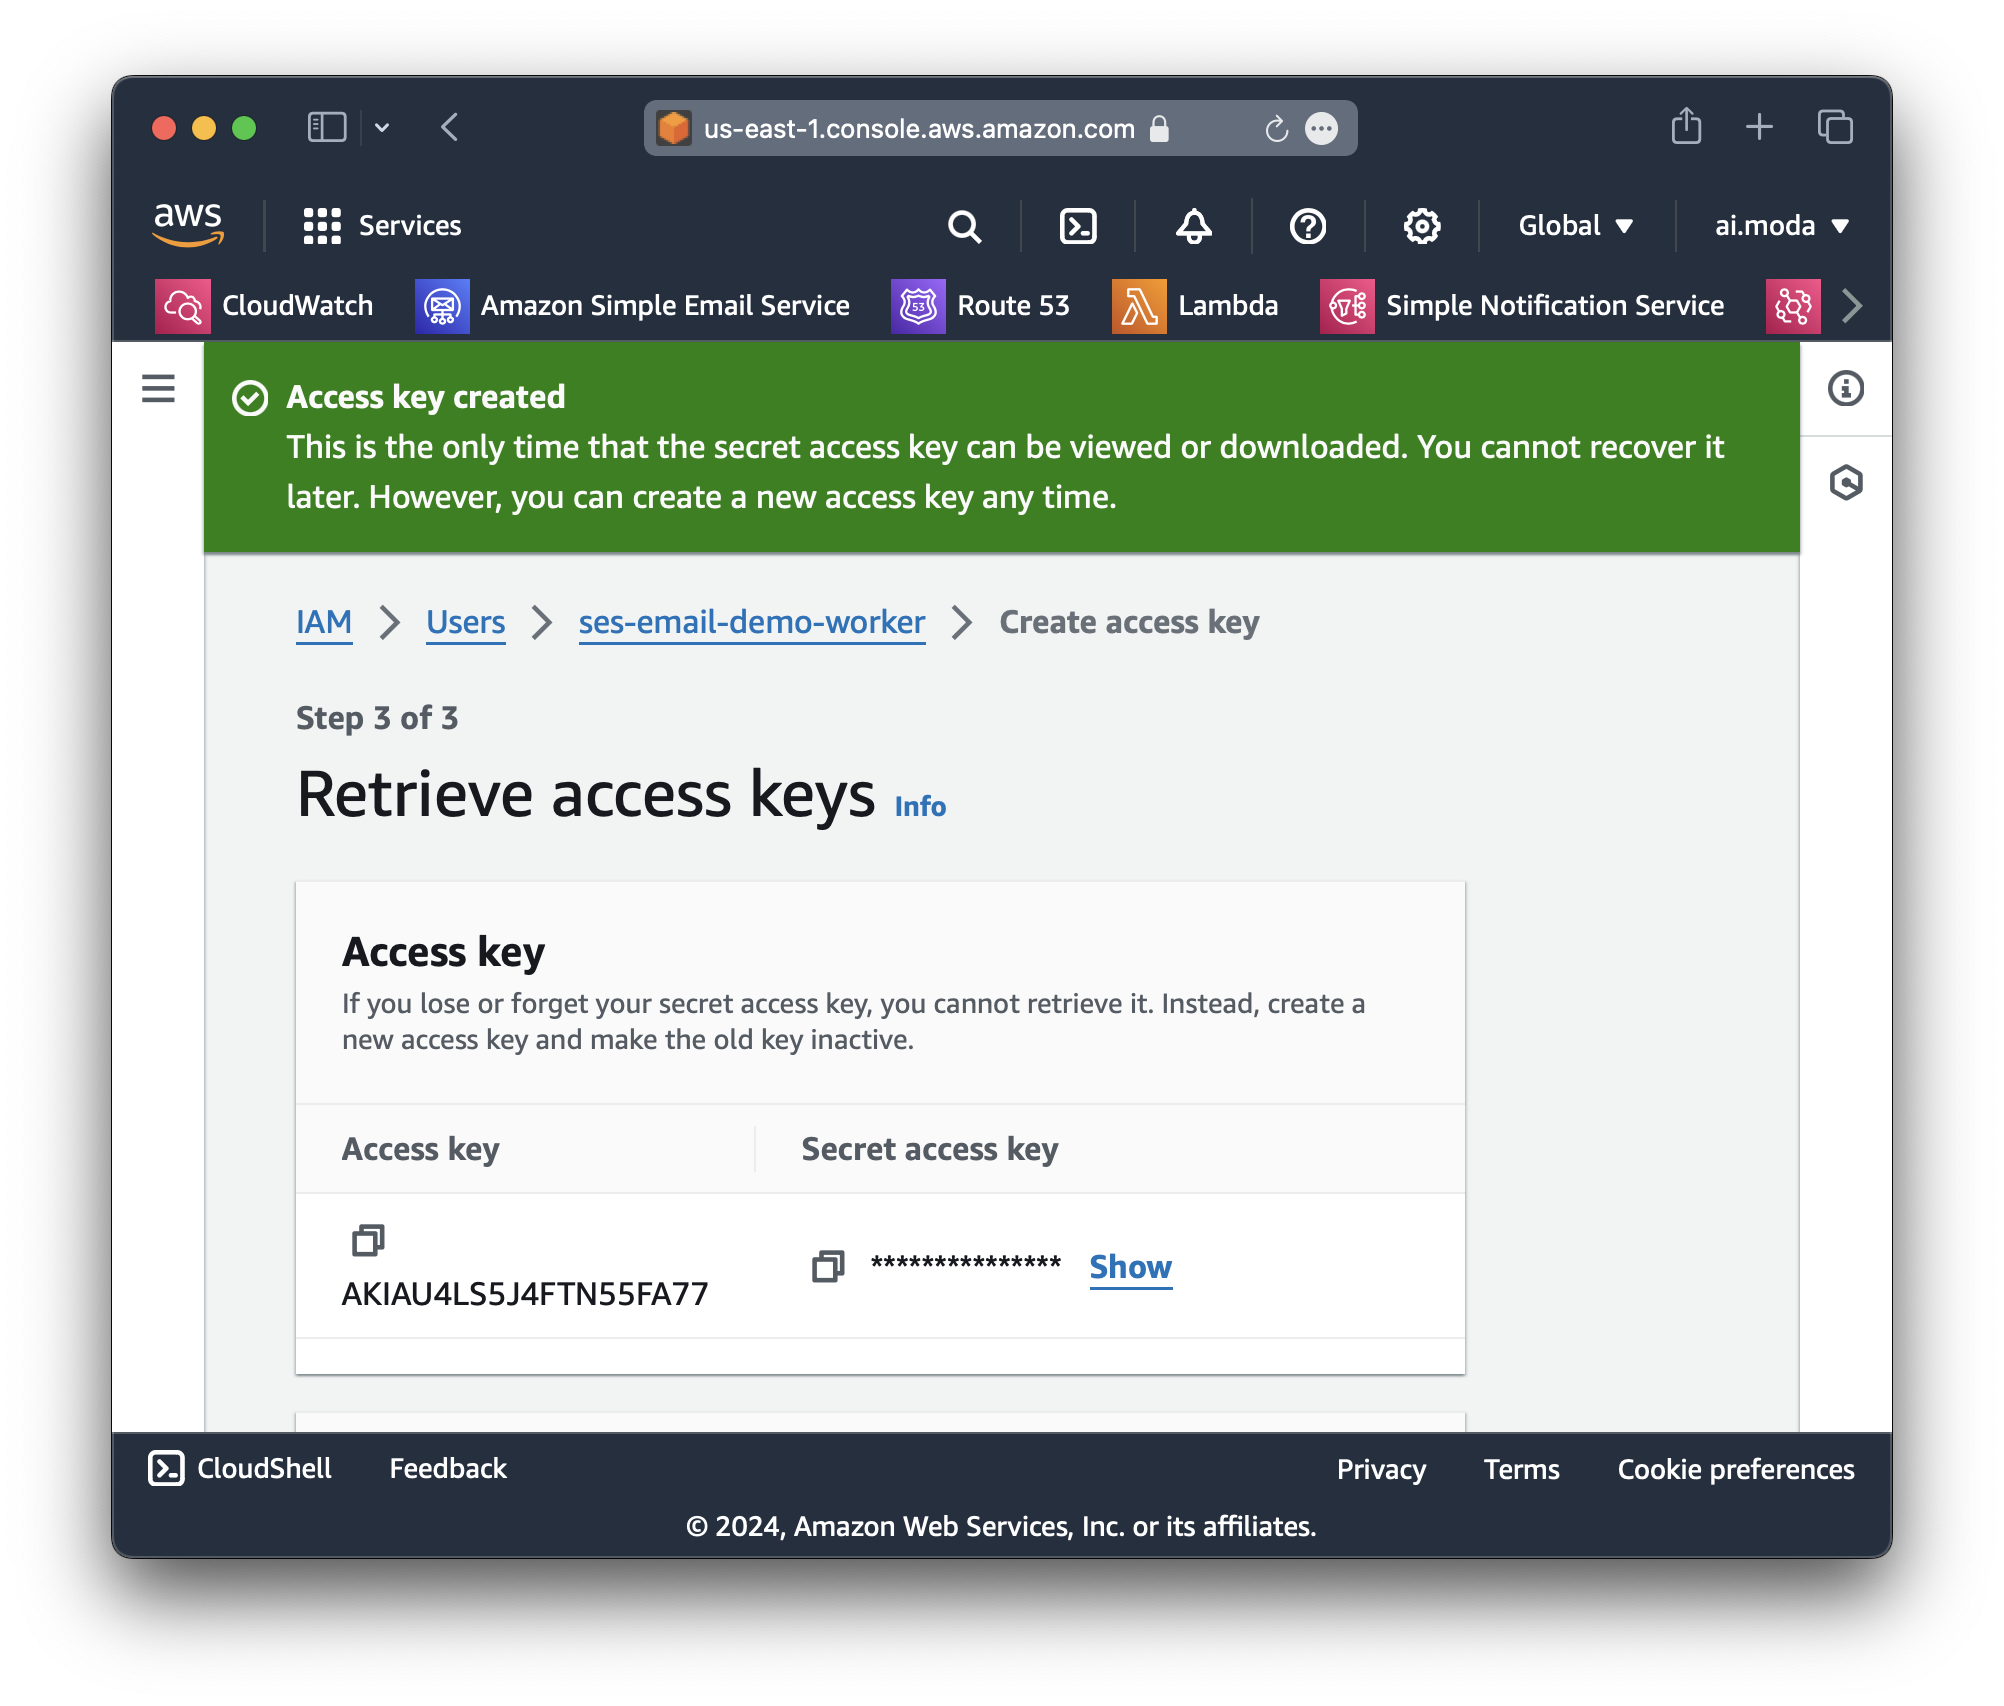
dev access keyStep 9: Copy the access key and secret access key.
Step 10: Put the dev access key into wrangler.toml:
# ...

[vars]
ENVIRONMENT = "dev"
AWS_SES_REGION = "us-east-2"
AWS_SES_ACCESS_KEY_ID = "AKIAIOSFODNN6EXAMPLE"

# ...
Adding the dev access key ID
Step 11: Put the dev secret access key into .dev.vars:
AWS_SES_SECRET_ACCESS_KEY = "wJalrXUtnFEMI/K7MDENG/bPxRfiCYEXAMPLEKEY"Adding the dev secret access key
Step 12: Test your Worker locally by running:
wrangler dev src/index.ts --test-scheduledLocal testing
And then visit: http://localhost:61023/__scheduled
If it's working, you should see the MessageId logged out, along with an email in your inbox!
[wrangler:inf] GET /__scheduled 200 OK (145ms)
SES response ok: 200
SES response body: {"MessageId":"010f0190d16ae627-9c25603e-4b13-4f75-846b-fede5ceeca0f-000000"}
Awesome! Time to wrap up and create the production access key.
Step 13: Create the production access key (same steps as the dev key).
Step 14: Add the production key as a secret in production by running:
wrangler secret put -e production AWS_SES_SECRET_ACCESS_KEYAdding the production key to the deployed Cloudflare Worker
Step 15: If all is well, you should see this from wrangler tail -e production every hour:
"4 * * * *" @ 7/20/2024, 12:04:54 PM - Ok
  (debug) SES response ok: 200
  (debug) SES response body: {"MessageId":"010f0190d11a86af-c2c5e5d1-2c0b-4d0c-8010-832ddf3f4843-000000"}
Success in production
Step 16: Deactivate the dev key.
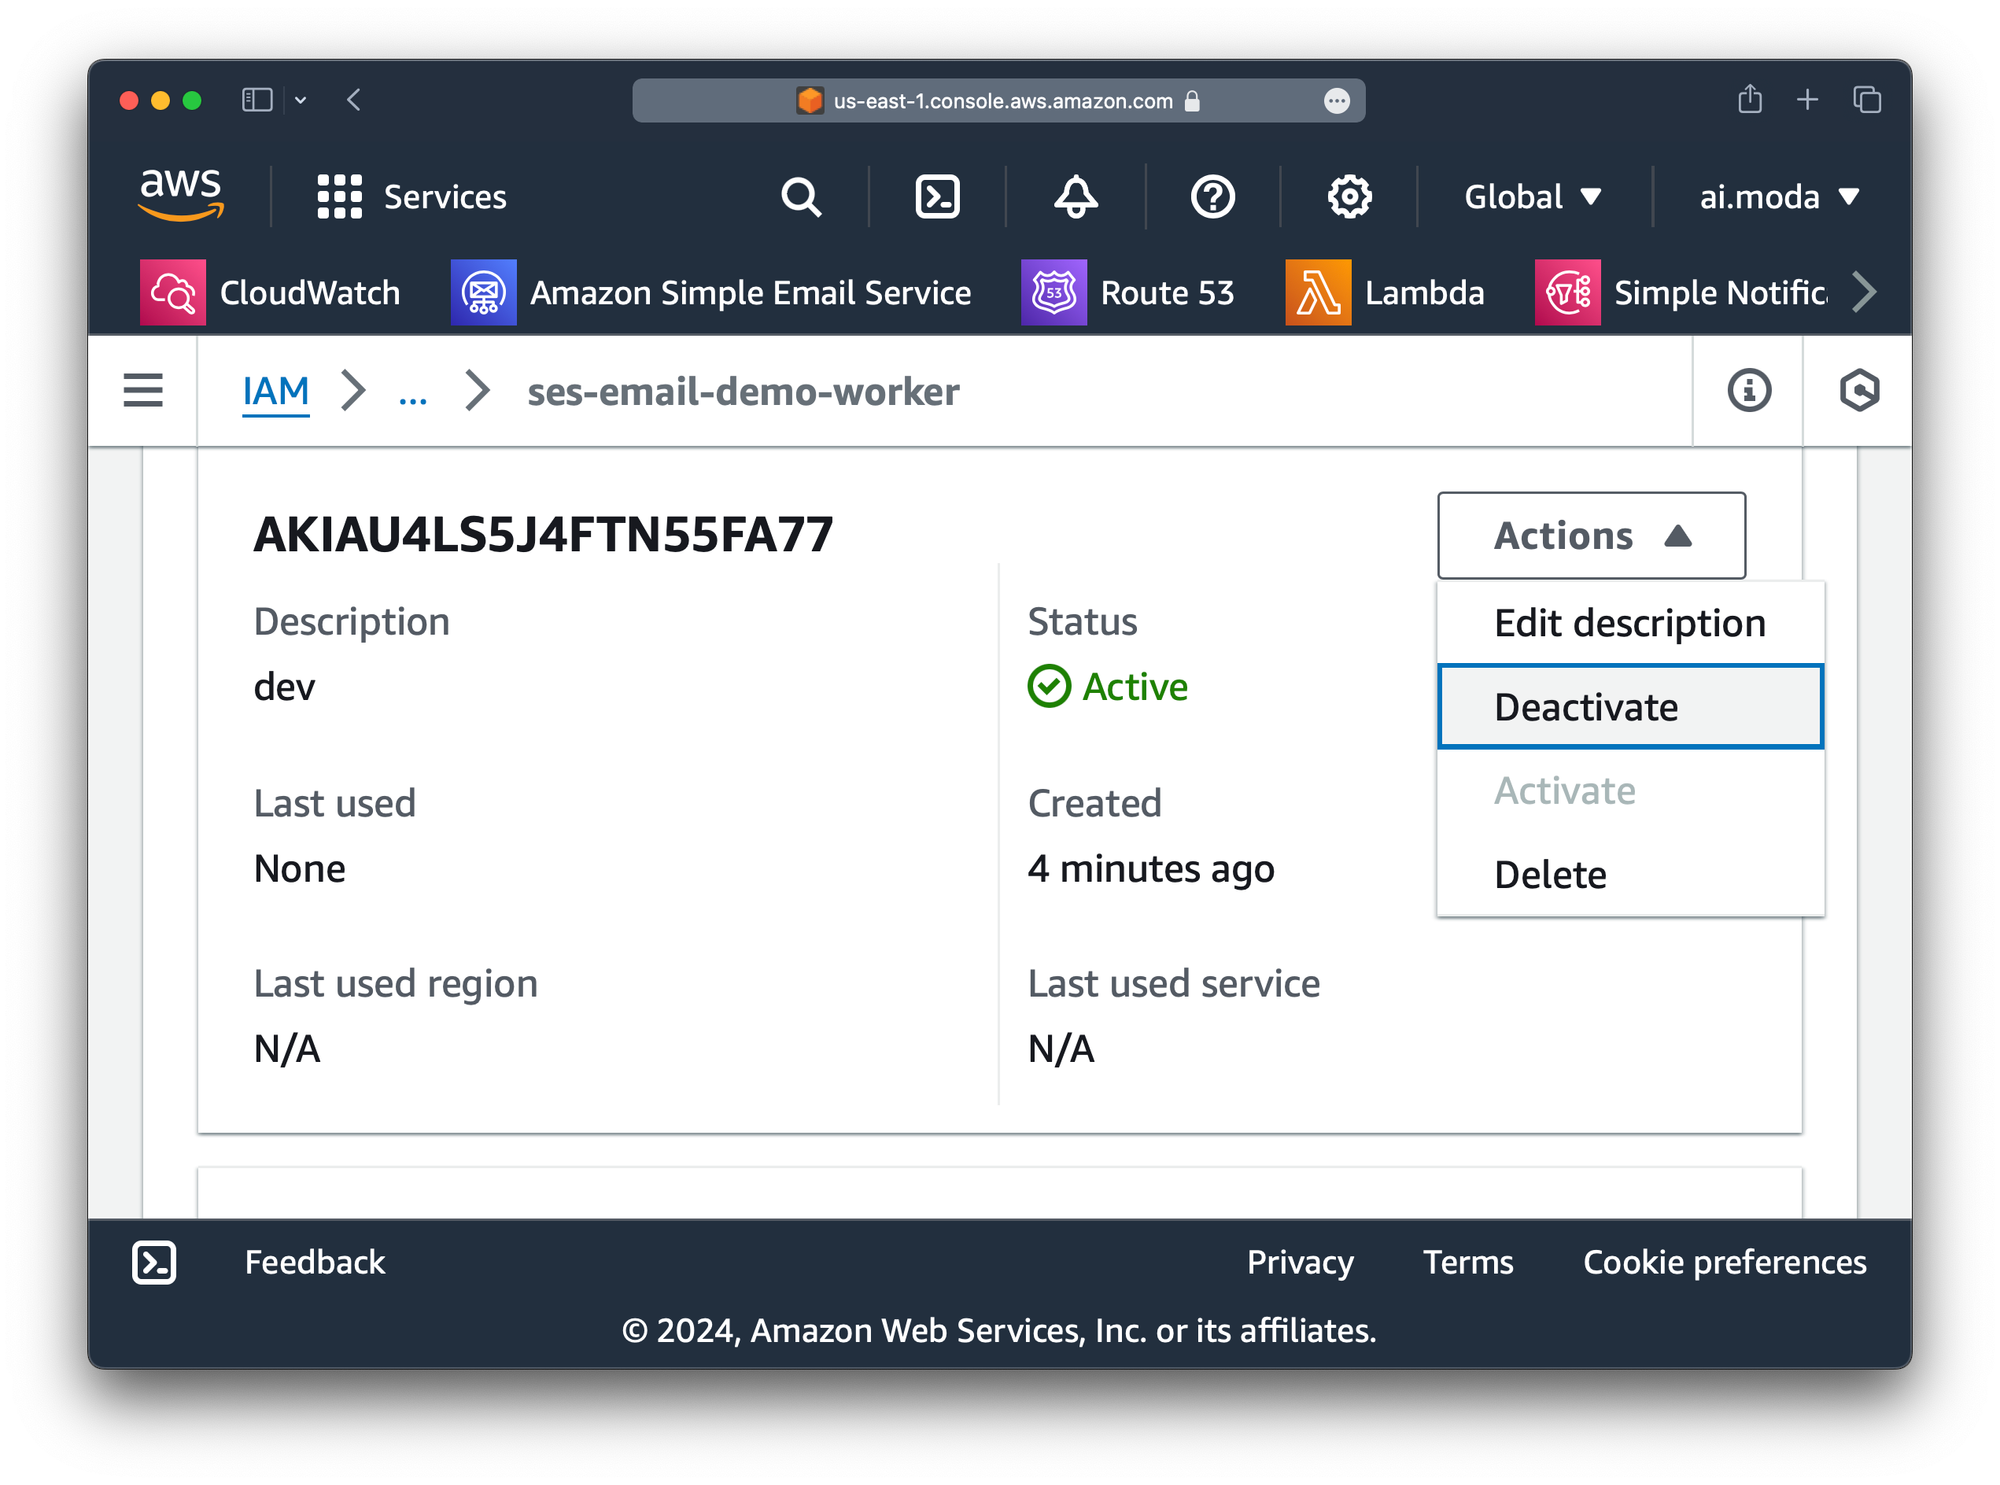
dev keyThat's it! In our next post, we'll show how to generate an email using LLMs from our Worker.